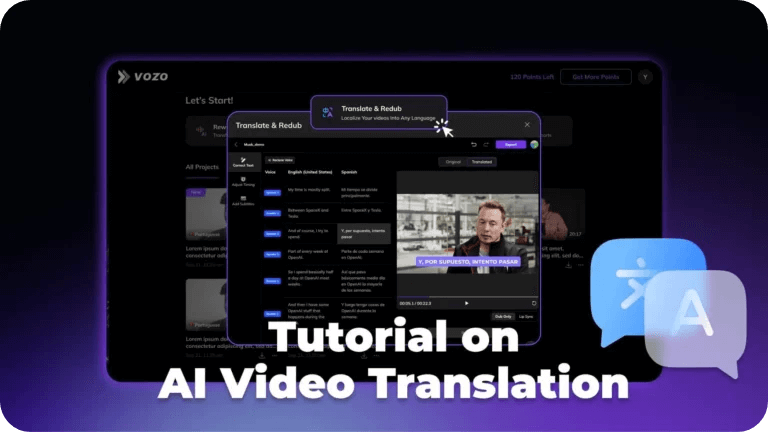
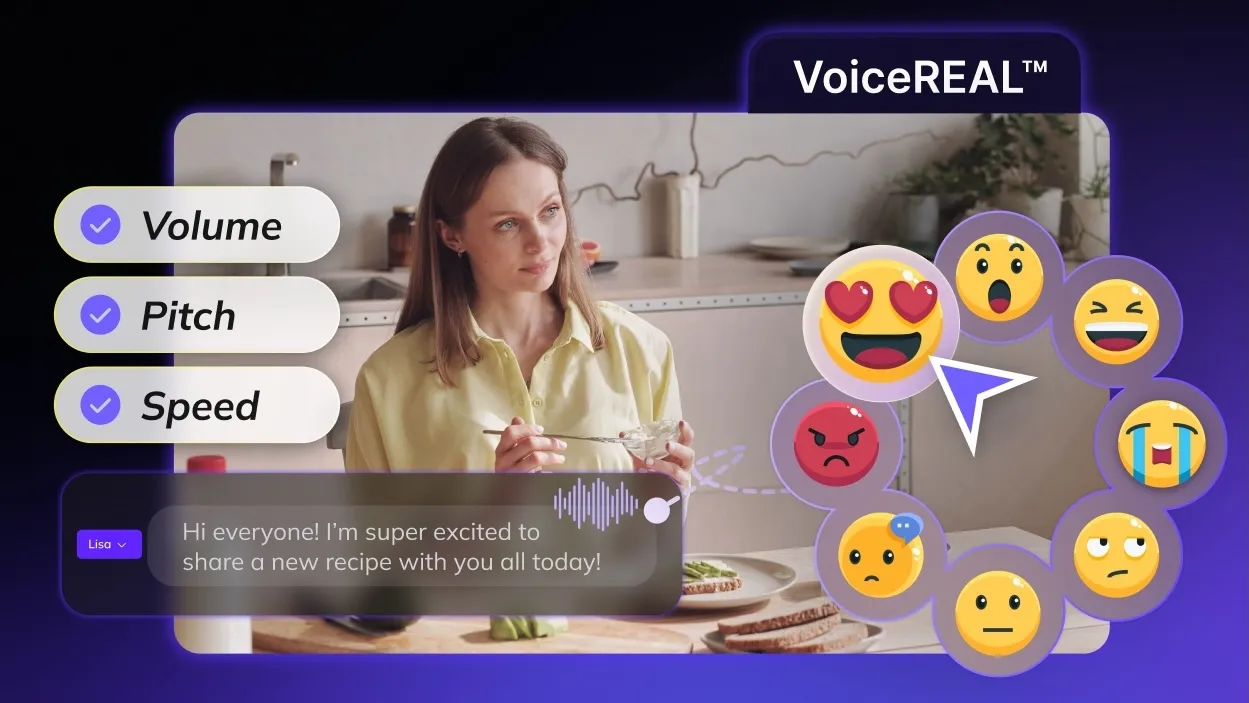
YouTube is a global platform with over 2.5 billion active users. This big audience gives content creators a great opportunity to reach viewers across the world. However, language barriers limit this potential with content that isn’t accessible and is not engaging.
Translating YouTube videos helps break language barriers and reach a wider audience. Whether you’re a viewer wanting to understand foreign-language videos or a creator aiming to break new ground, translating YouTube content opens your reach to millions.
This guide will show you exactly how to do it. Let’s first look at how viewers can auto-translate YouTube videos in just a few clicks. Next I will demonstrate how creators can add translations to their video using YouTube’s tools or by uploading subtitle files. Finally, we will review a method for translating YouTube videos without subtitles, using AI.
How to Auto-Translate YouTube Videos as a Viewer
Have you ever found an interesting YouTube video but realized it was in a language you couldn’t understand? Don’t worry, YouTube has a built-in feature, which helps translate subtitles to your preferred language.
1. Open Closed Captions
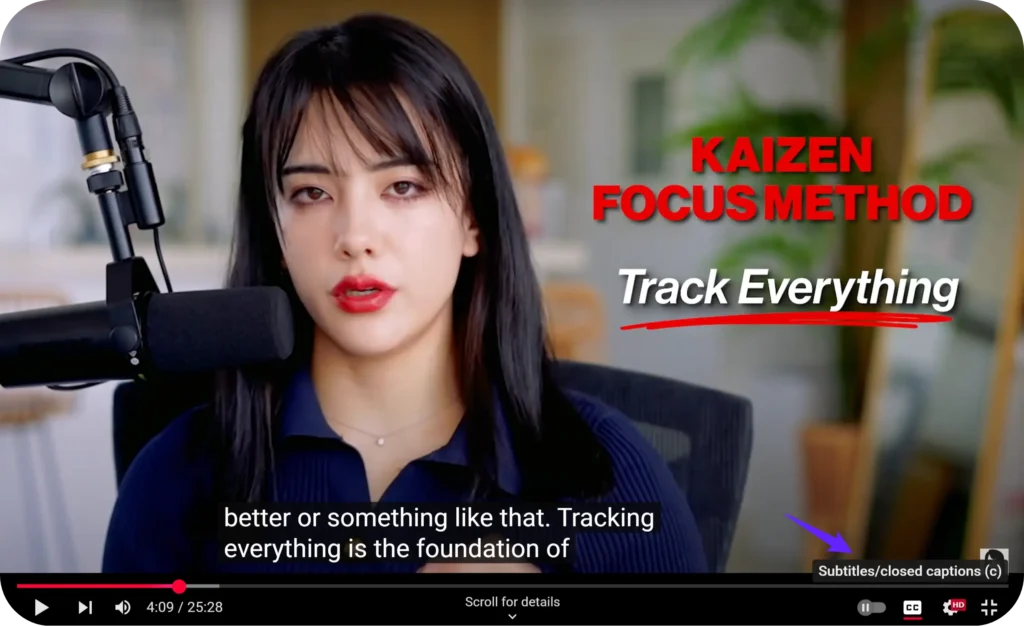
First use the YouTube video you wish to watch, play that video. Check the bottom part of the video player. There is a small “CC” button, which means Closed Captions. Click it to turn on captions. You need to make sure the video has captions — either auto-generated or uploaded by the creator — otherwise, auto-translation won’t work.
2. Click “Settings” Beside “Closed Captions”
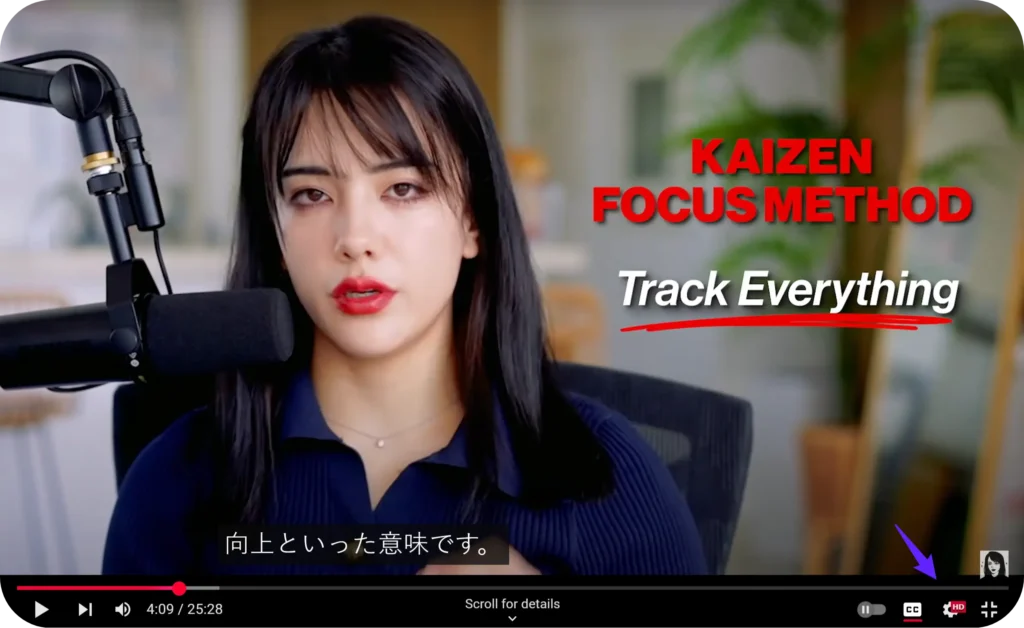
Next, click the Settings icon (the small gear) located to the right of the Closed Captions (CC) button.
A small menu will pop up. Go to that menu and click on “Subtitles/CC.”
If the video has English captions, then it will show “English (auto generated)” or “English”.
3. Click Auto-Translate
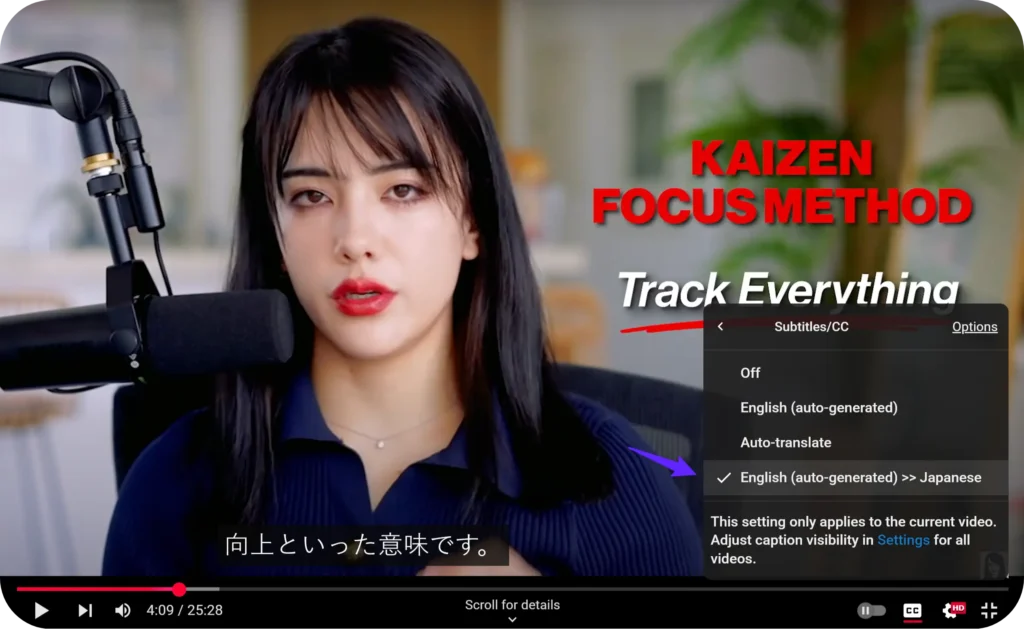
When you get to the Subtitles menu, you will be able to see “Auto translate.” Click on it.
Scroll to your preferred language, select it, and YouTube will translate the captions automatically.
This usually takes only a second or two, and then, you can watch the video in a language you are familiar with!
Read More: Best Chrome Extensions for Youtube Video Translation
How to Translate YouTube Video as a Creator?
Translating your videos helps you reach more viewers from other countries and grow your channel worldwide.
YouTube gives you two main options for translating your videos: auto-translating existing captions, or adding your own translated subtitles. Let’s walk through both.
1. How to Auto-translate YouTube Video
Without uploading anything, YouTube can automatically translate the video captions.
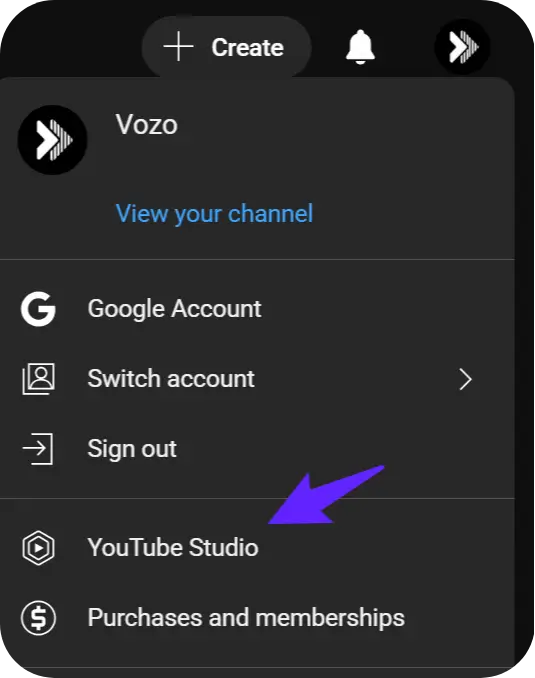
Step 1: Click on your account icon in the top right corner of the YouTube screen. Then click on “YouTube Studio”.
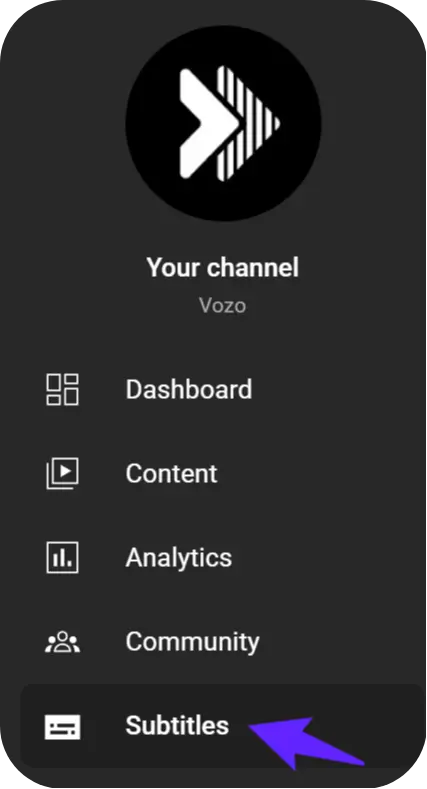
Step 2: Click on “Subtitles”.
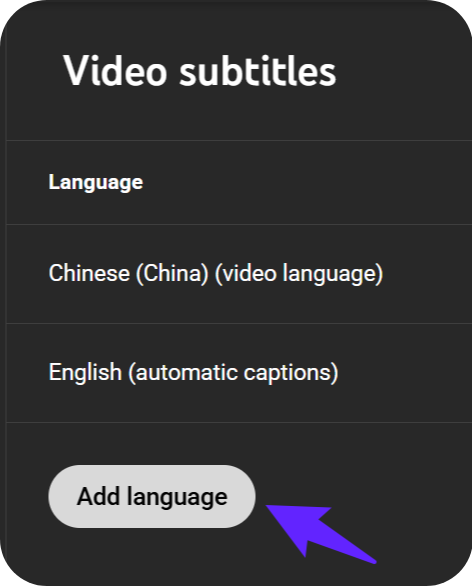
Step 3: Click on the video you want to translate. Then click “Add Language” and select your language.
Step 4: Click “Auto-translate”. Then click “Publish.”
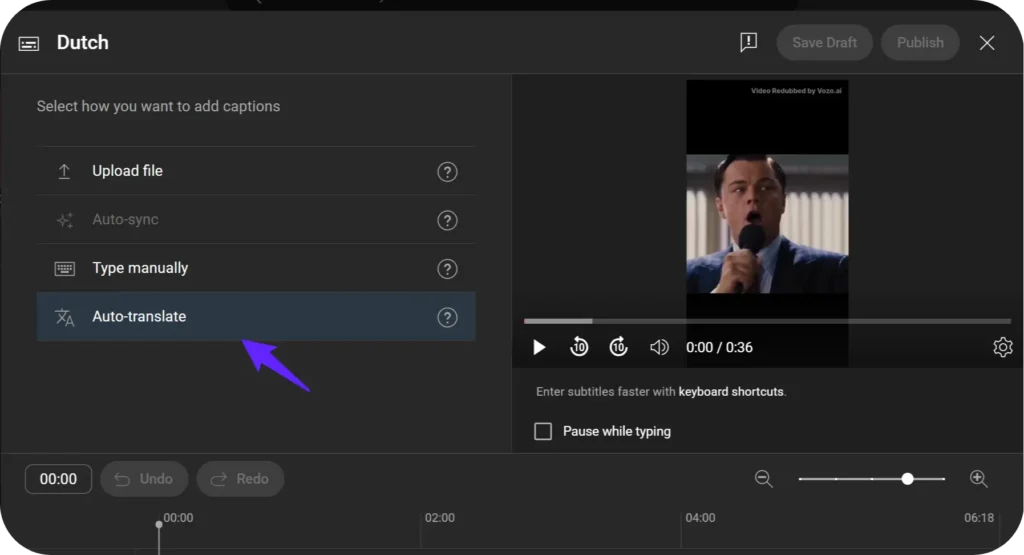
If your videos already have auto-generated captions or uploaded subtitles, the auto-translate feature will automatically translate them into other languages.
But here’s something you should know:
Some YouTube videos don’t have any transcript at all.
- If there’s no transcript (no subtitles uploaded or auto-generated), YouTube can’t auto-translate it.
So, it’s important to make sure your video has subtitles first. - Also, relying only on auto-translate isn’t always perfect. It may misinterpret jokes, slang or cultural references.
Upload your own subtitles to get accurate translations and keep your video’s message clear.
2. How to Add Translated Subtitles to YouTube Videos
If you use your own translated subtitles, you will have full control of the translation. Here’s how to do it:
- First, go to YouTube Studio.
- On Content, click the video you wish to work on.
- Click Subtitles at the left menu.
- There will be an Add Language button — click the language you want to add.
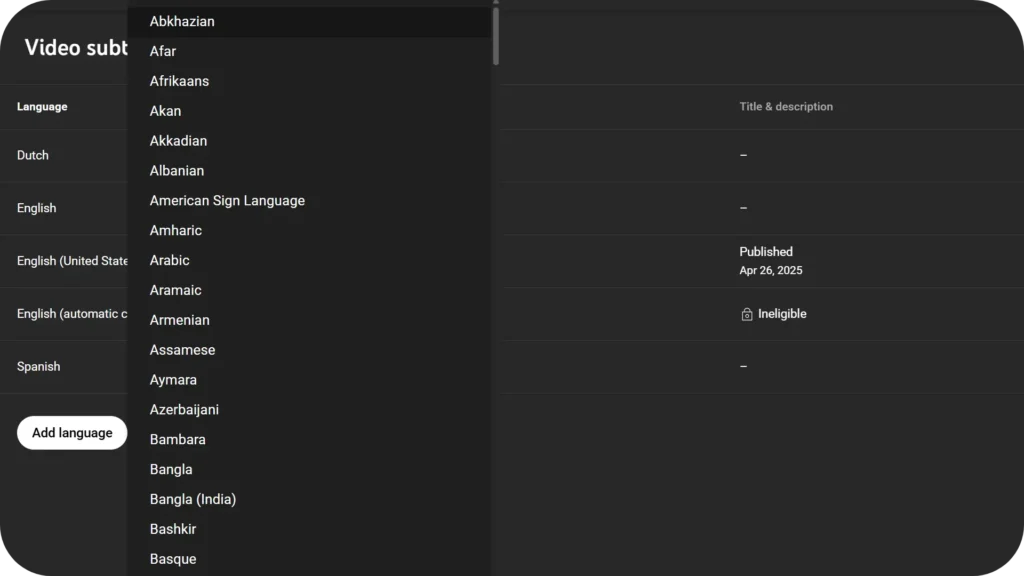
5. Then, just choose Upload a file.
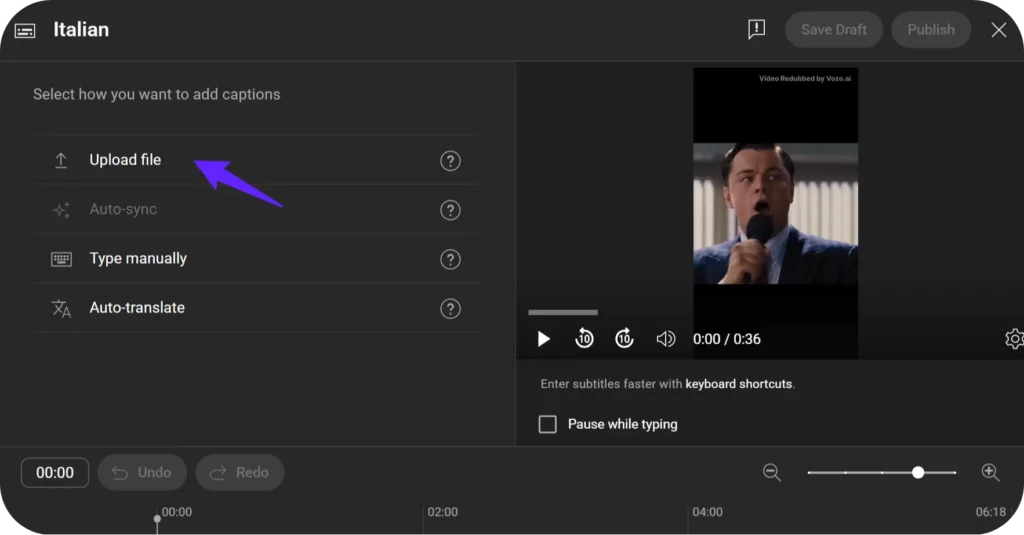
6.Set your translated .srt file, ensure it’s synced with video timing.
Once uploaded, translated captions make it easier for viewers to follow along — and they can improve your video’s SEO by adding searchable, keyword-rich content.
3. How to Translate Video Titles and Descriptions?
When it comes to reaching an international audience, subtitles aren’t enough. In addition, YouTube lets you translate your video titles and descriptions!
After selecting your video in YouTube Studio, scroll down to Title and Description under Subtitles section.
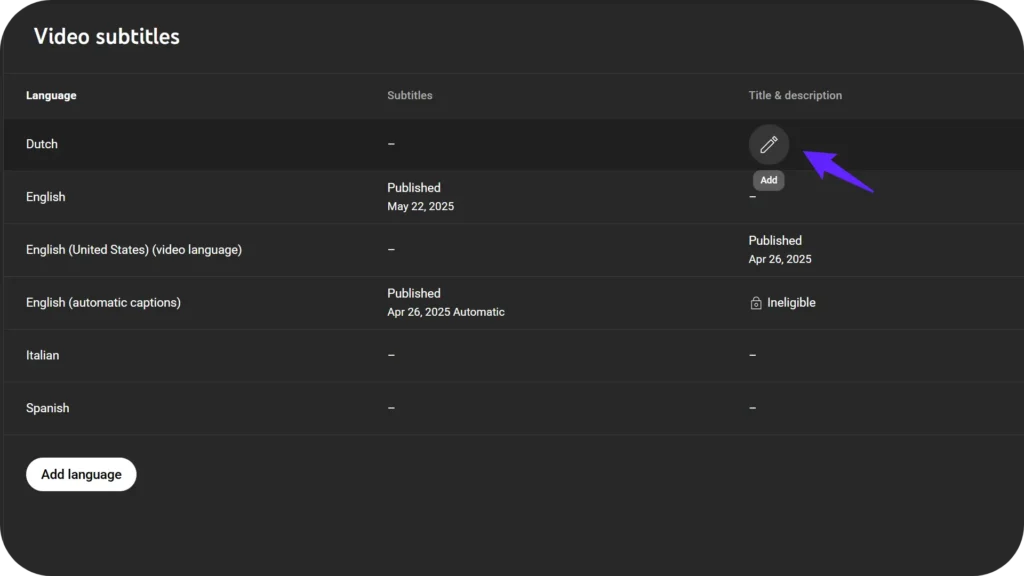
Here you can manually add translated versions for each language.
It makes it easier for people to find your videos via search in their own language.
This is a way to increase views without creating a new video.
Source: https://support.google.com/youtube/answer/6289575?hl=en
Translated titles and descriptions also help YouTube’s algorithm recommend your content to users in other countries.
You can build a global channel faster than ever before if you do everything mentioned above — auto translate, upload subtitles, translate titles/descriptions.
How to Translate YouTube Videos without CC
Have you ever found a YouTube video you wanted to watch but there were no captions and you were unable to understand a single word? Translating YouTube videos without closed caption (CC) may be a headache but thanks to AI, it’s not as bad as it had been.
Even if you are not a tech expert you can translate videos without pre-existing captions, and you can do it whether you are trying to enjoy foreign content or expand your own channels reach internationally.
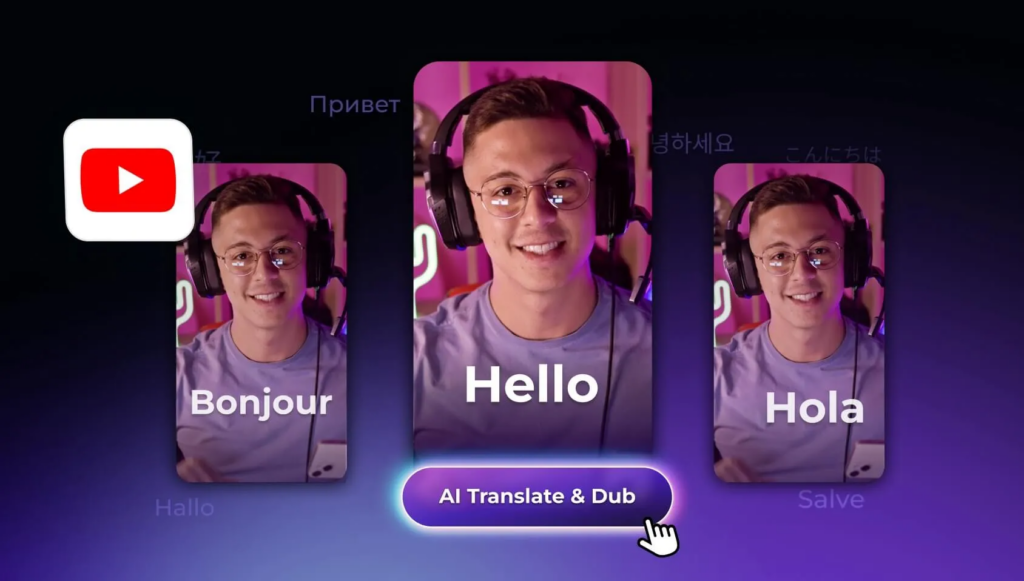
Tools Recommeded:
Challenges of Translating YouTube Videos without Closed Captions
The thing is, you are starting from scratch without captions. If there’s no existing text, like in a livestream, you’ll have to extract the audio, transcribe it, translate it, and then add it back to the video. Doing it manually takes time, and is a very expensive proposition if you hire pros to do it.
Translate YouTube Videos with AI
This is where AI tools step in and change the game.
Most mobile energy platforms are complicated or expensive. AI makes it easy with just a few clicks.
It digitally extracts the voice from your video, transcribes it, translates it into your selected language, and even records an artificial intelligence voiceover with a perfect audio and professional sounding speech.
Auto translation is provided by traditional YouTube CC, using Google Translate, while AI provides accurate translation with natural voice and precise lip sync. Vozo is the top-rated player with affordable prices.
Step-by-Step Guide to Translating YouTube Videos with AI
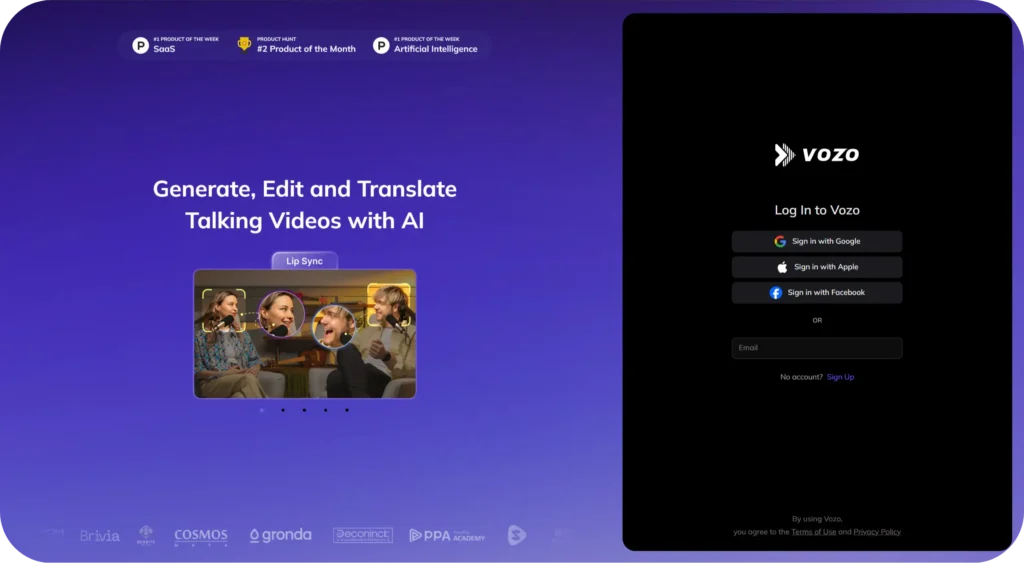
1. Access Vozo Video Translator
Navigate to the Vozo Video Translator page. This platform is designed to handle video translations seamlessly, even for videos lacking captions.
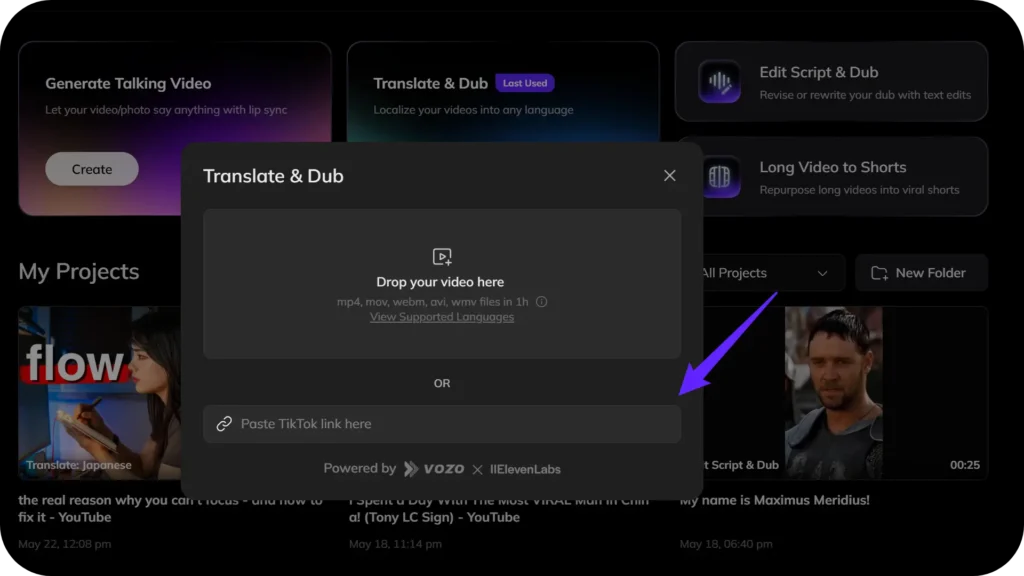
2. Paste the YouTube Video Link
Copy the URL of the YouTube video you wish to translate and paste it into the designated field on Vozo’s platform. This gives Vozo the opportunity to fetch the video for processing directly.
3. Select Target Language and Preferences
Select your target language on the available options. Vozo, supports over 120 languages, including English, Spanish, French, Japanese, .etc, as many as you want. Also select if applicable, the content genre and the number of speakers in the video. This is because the preferences help Vozo better tailor the translation.
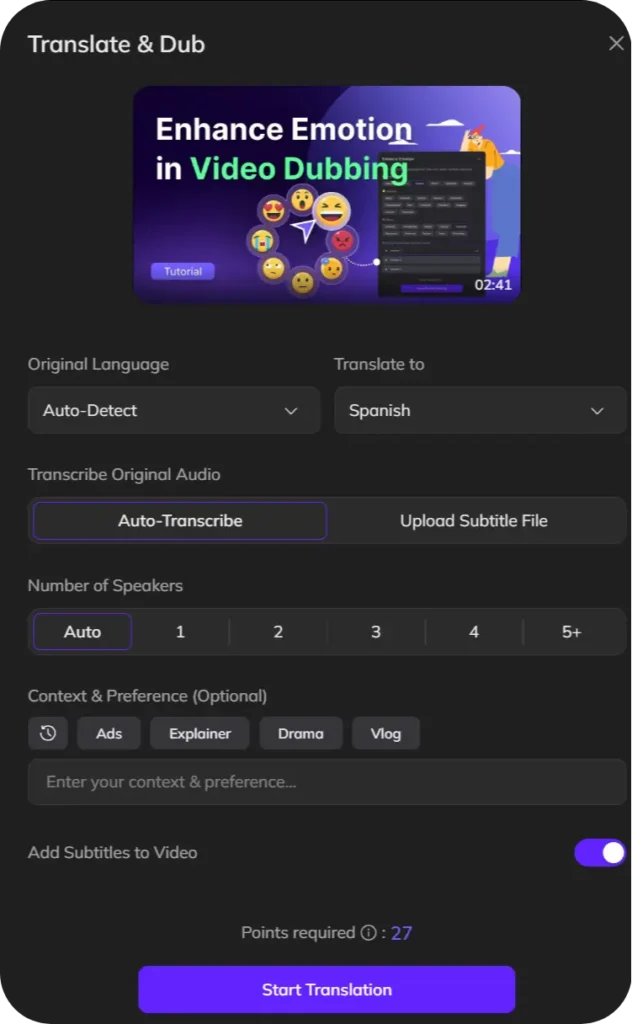
4. Initiate the Translation Process
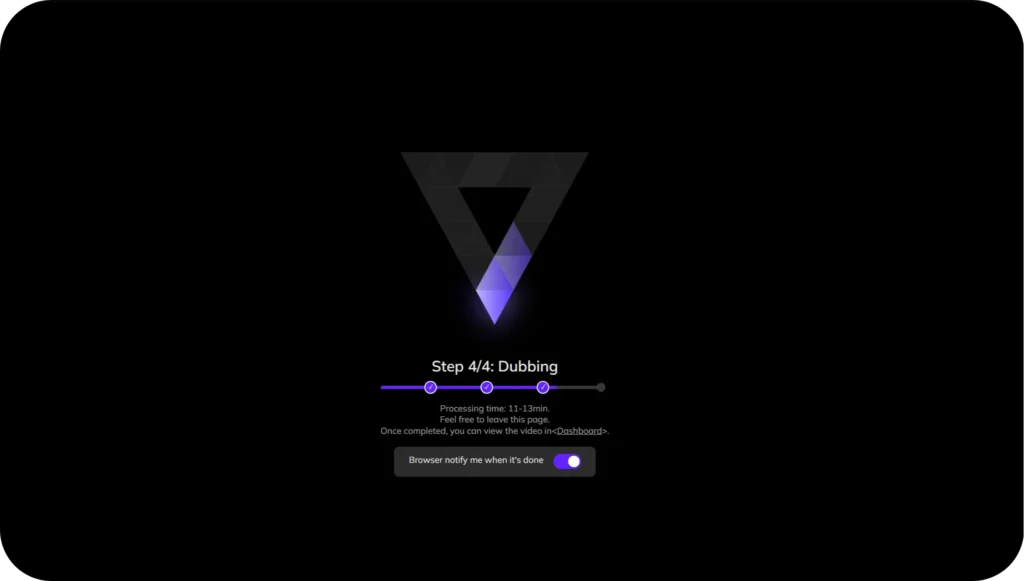
Once on the page click on the “Start Translation” button. It will automatically pull out the audio, transcribe the content, have it translated into the selected language, and automatically generate a dubbed version with the lip movements synced. Depends on the video length, It takes between several to twenty minutes to do this process.
Further Read:
- What is AI Dubbing In Video Translation
- How to Dub a Video to Another Languages
- 10 Best AI Dubbing Software
5. Review and Edit the Translation
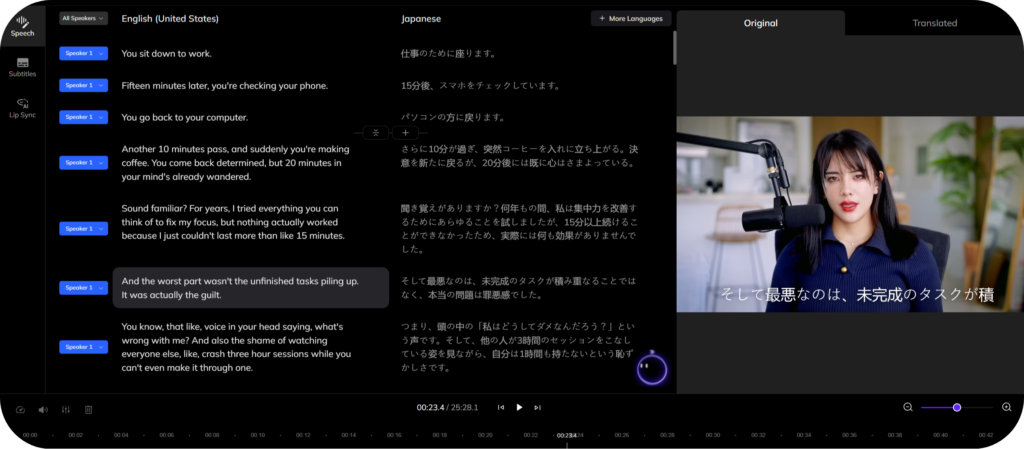
When the translation is completed, you will be taken to the editing interface. You may also see the translated script vs original and make changes to the translation to match the video’s context. Vozo’s AI Pilot function will help to refine translations to reflect your brand’s voice, and cultural nuances.
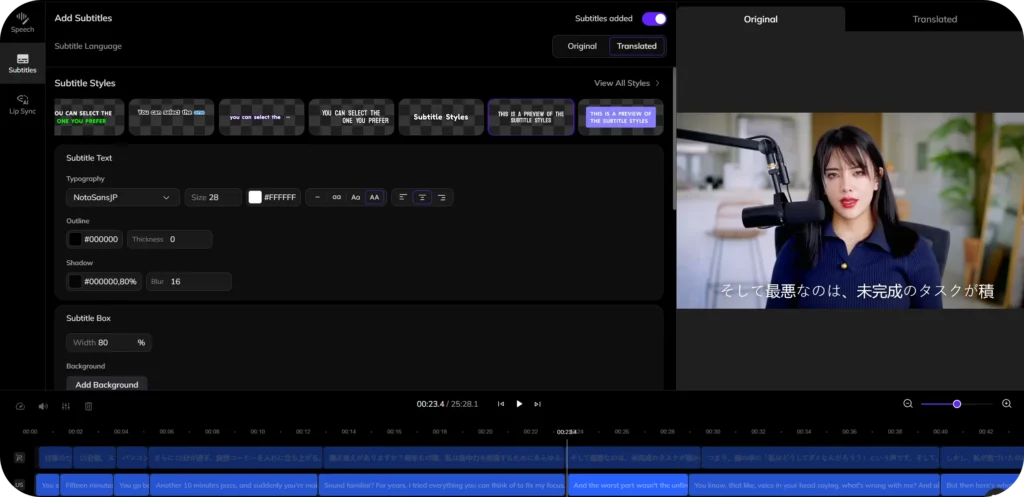
6. Add Subtitles and Finalize
If desired, enable the “Add Subtitles” option to add captions in the Youtube video. Vozo also allows exporting subtitles as SRT files for further use. After finalizing, you can preview the translated video and download it for distribution.
In conclusion: With AI, translating YouTube videos without CC is now faster, cheaper and much less stressful.
Benefits of Translating YouTube Videos
Translating your YouTube videos isn’t just a plus, it’s an opportunity to reach more audience across the world. The more viewers, the more watch time, the more engagement and maybe a higher ad revenue.
Furthermore, offer multilingual options can significantly improve your channel’s SEO and your content becomes easier to be found on your particular target countries.
Here are a few benefits of translating YouTube videos:
- Expand your audience globally:
It reaches viewers who speak different languages and will help grow your subscriber base around the entire world. - Boost engagement:
Content in native language is more likely to be watched, Liked, Commented and shared. - Improve SEO and discoverability:
As a result, multilingual videos will rank higher in search results depending on countries. - Increase watch time and revenue:
This way, greater reach might result in longer periods of viewing and generated ad revenues. - Build trust and loyalty:
Translations offer: You are showing that you respect your audience’s diversity and are more likely to keep them engaged.
Translating your videos can help you grow your audience, increase the visibility of your channel across the globe. Not bad for a few extra clicks with the right AI tool!
· FAQs for Youtube Viewers
How do I turn on auto-translated subtitles on YouTube?
It’s pretty simple! First, click the “Settings” (⚙️) icon on the video. Then go to “Subtitles/CC”, select “Auto-translate”, and pick your preferred language. Just remember: this only works if the video already has captions available.
Why are translated subtitles sometimes inaccurate or unavailable on YouTube?
Auto-translate depends on the original captions. If the captions aren’t well-written or the creator didn’t enable them, translations can be missing or messy. Plus, machine translation isn’t perfect, so you might spot errors in phrasing or context.
· FAQs for Youtube Creators
How can I make my YouTube videos understandable to a global audience?
You have two main options, add your own translated subtitles automatically or manually:
1.Enable captions first, so YouTube’s auto-translate feature can help viewers in different languages. 2.Manual subtitles give you way more control over quality and accuracy.
Should I rely on YouTube’s auto-translate feature for my videos?
It’s definitely a convenient starting point — it’s easy and free. But keep in mind, it relies on Google Translate , which aren’t always 100% accurate. For the best viewer experience, especially if you have a big international audience, manual translations are a smarter move.
How do I add translated closed subtitles (CC) to my own YouTube videos?
Inside “YouTube Studio”, go to “Subtitles”, choose your video, and click “Add Language”. Then you can: – “Upload” your own subtitle file, – “Auto-sync” with a transcript, – “Type manually”, or – Use “Auto-translate” (then edit for accuracy). Adding your own translations helps viewers follow along without confusion!
What’s the difference between auto-generated captions and manually added subtitles?
Auto-generated captions are created by YouTube’s speech recognition, and they do mistakes — especially with accents, names, or technical terms. Manually added subtitles, whether in your original or a translated language, are checked by humans, so they’re typically much more precise.
· FAQs on Translating Video Without CC
How can I translate a YouTube video if it has no Closed Captions (CC) or subtitles?
If a video has no captions, YouTube’s built-in translation won’t work. In that case, you’ll need an external AI tool, like “Vozo AI Video Translator”, that can listen directly to the video’s audio and create translated subtitles from scratch.
Can I translate the actual audio (dub) of a YouTube video, not just the subtitles?
Yes, you can! Some advanced tools can not only translate the speech but also generate a dubbed voiceover in another language. This makes the viewing experience even more natural for global audiences.
Read More: Dub vs Subtitles

